TouchCast Pitch Windows: Prepare Mode
General - Prepare Mode Screen Layout
The Prepare activities build the content of the presentation authors use as they record. Scenes are organized similarly to slides, but unlike traditional presentation tools, Pitch allows authors to incorporate engaging visual resources including websites and documents in with images and text.
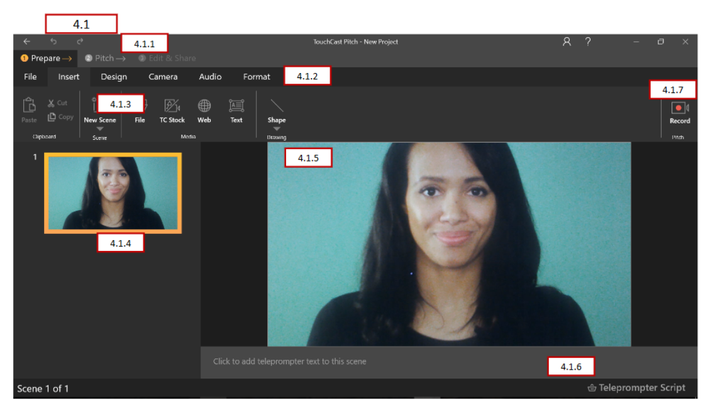
4.1.1 Mode Selections
The Mode Selections (Prepare, Pitch, Edit & Share) represent major phases of the Pitch development process.
4.1.2 Menu Options
The Menu options available for the Prepare Mode are: File, Insert, Design, Camera, Audio, and Format.
4.1.3 Sub-Menu Options
The Sub-Menu options displayed vary depending on the menu option currently selected. In the sections which follow, the sub-menu for each Menu option is explained.
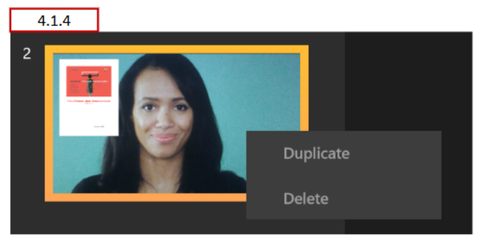
4.1.4 Scene List
The Scene List presents a scrollable list all of the Scenes the author has added to the Pitch. The sequence of Scenes in the tray represents the order they will be used when the Pitch is recorded. Scenes can be moved, duplicated, or deleted using Scene List functions.
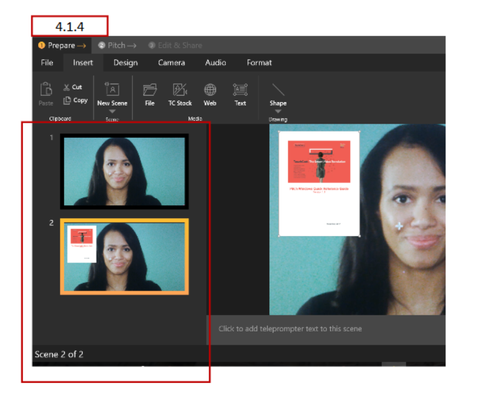
The order of scenes in the Scene List can be changed by ‘dragging’ them (click, hold, and move with cursor) and scenes can be duplicated or deleted by right clicking on the scene thumbnail and selecting the action.
4.1.5 Scene View
The Scene View area displays the full size image of the Scene currently selected in the Scene List.
4.1.6 Teleprompter Script
The Teleprompter Script option is used to create the script for each Scene.
4.1.7 Record Option
Clicking the Record Option icon opens the Pitch Mode.
File Menu Option

Insert Menu Option
The Insert options are used to create and maintain Pitch scenes (the Scene List) which the author will use as the presentation video is being recorded.
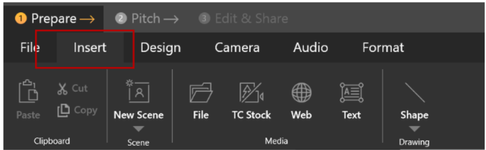
The Insert options are organized as follows:
- Clipboard options – Used to Cut, Copy, and Paste objects from/to scenes
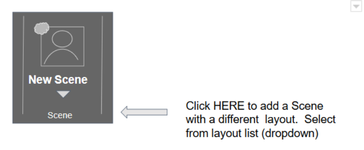
- Scene – Used to add a new scene to the Scene List using templates
- Media – Used to create scenes using File, Web, or Text media
- Drawing – Used to add line, arrow, circle, and rectangle objects to scenes
Additionally, the Scene List provides options for managing scenes within the Scene List.
Clipboard Options to Manage Interactive Objects
The author can Cut, Copy, and Paste interactive objects from/to scenes using clipboard commands. The process begins by selecting an object already placed on a scene, then selecting the clipboard action (Cut or Copy) to be performed with the selected object. The next step is to select the scene to place the object and select the clipboard Paste option.
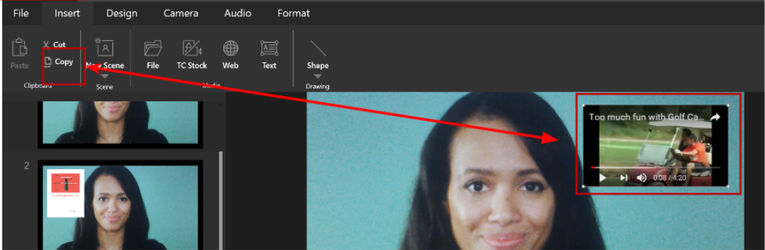
Object Copy Example
Select the object (in this case a website video), then click the clipboard Copy action.
Scenes (Adding New Scenes)
For this topic we have created a new Pitch project using the Architecture Theme. The presentation initially contains one scene, a title layout. (this demonstrates one of the features of Themes and Theme Layouts).
Once the presentation title has been edited it's time to add additional scenes. In the examples below, new scenes are added using two methods.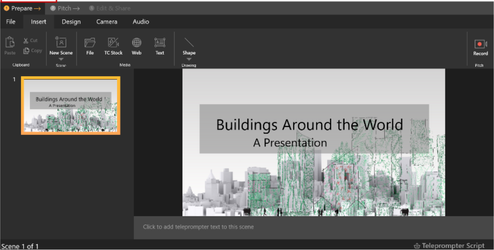
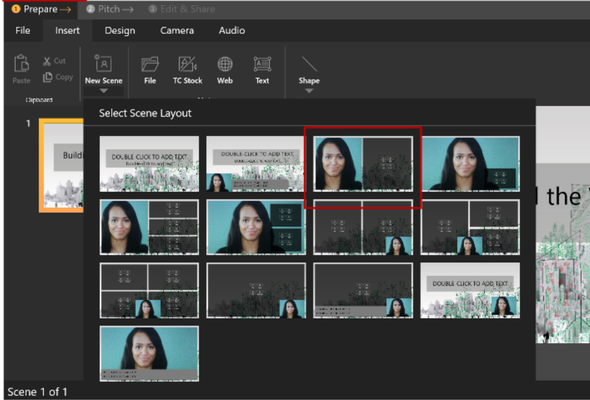
Adding a New Scene Selecting Layout
The first method is to add a Scene by selecting one of the Scene Layouts associated with the Architecture Theme we selected to create the project. To do that, click the lower portion of the New Scene sub-menu button. A selection of Scene Layouts displays.
In this example the layout splitting the scene 50/50 vertically with the camera feed on the left and interactive objects on the right is selected.
A new Scene is added to the project (see bottom of the Scene List). Normally, the author would select select the interactive objects to place on that right hand side of the scene but that will be shown in a later section.
