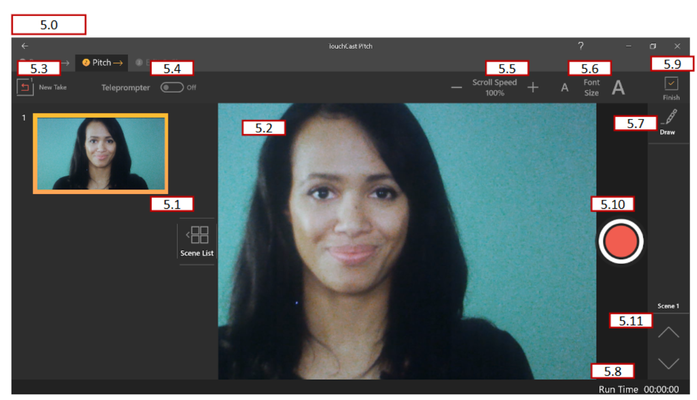
TouchCast Pitch Windows: Pitch Mode
The Pitch Mode options are used to record the presentation. This is where all inputs (camera view, microphone audio, scenes, scene objects, text, and drawings) come together, recorded so the presentation can be viewed by others.
5.1 Scene List and Scene List Display Control
The Scene List displays the scenes created during Prepare mode as thumbnails along the left hand side of the Pitch screen.
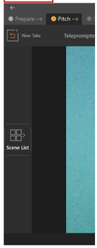
The Scene List Display Control is used to display (expand) or hide (contract) the Scene List. If the Scene List is already displayed, clicking on the control causes the Scene List to contract out of view. If the Scene List is contracted, clicking on the control causes the Scene list to expand.
Example of contracted Scene List:
5.2 Selected Scene
What appears in this area is what is being recorded (or will be recorded).
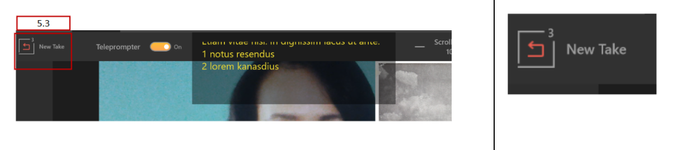
5.3 New Take Control
The New Take button allows the presenter to repeat recording the last scene. All recorded takes for a scene are retained and can be used. By default the last recorded take will be shown in Edit Mode, but previous takes can be reviewed and selected. The New Take Control displays the number of takes recorded for each scene if multiple takes have been recorded.
5.4 Teleprompter On/Off Control
The Teleprompter On/Off Control (toggle) allows the presenter to display the teleprompter script as scenes are recorded. Other teleprompter control (scroll speed and font size) will remain inactive when the Teleprompter is set Off. The default setting is On.
The teleprompter script appears as semi-transparent text because it is not displayed in the presentation (it is not recorded as a layer of the recorded presentation.) If the script is longer than what can display in a few lines, the text will scroll through the display field.
5.5 Teleprompter Scroll Speed Control
If the script is longer than what can display in a few lines, the text will scroll through the display field. The speed at which the Teleprompter Script scrolls is controlled by the setting of the Scroll Speed control. A scroll setting of 100% is an average reading speed.
Clicking the ‘-’ (minus) icon decreases the scroll speed 10%
Clicking the ‘+’ (plus) icon increases the scroll speed 10%

5.6 Font Size Control
The font which the Teleprompter Script displays is controlled by the setting of the Font Size control. There are 15 font size setting and the default font size is the 3rd setting.
Clicking the ‘A’ (smaller A) icon decreases the font 1 size
Clicking the ‘A’ (larger A) icon increases the font 1 size

5.7 Draw Control
The Draw control is used by the presenter to add illustrations to a scene using the cursor as their drawing tool. These drawings can be placed on the scene while recording is active or can be placed when the recording is paused (so that the illustrations will already be in place when recording is resumed.
There are five Draw Control options available:
- Ballpoint Pen
- Pencil
- Highlighter
- Eraser
- Ruler
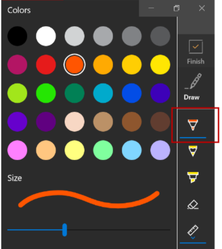
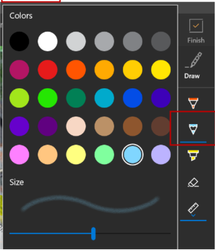
5.7.1 Ballpoint Pen
Draws a bolder (more dense) line than the Pencil option. The color of the pen icon indicates the color which will be used for new illustrations. Clicking the arrow immediately below the tip of the pen icon opens a pallet where the illustration color can be selected from 30 color options and line width is selected using a slider control.
Once the color and size are selected, the cursor is used to draw on the scene.
Clicking the main Draw Control icon again, reverts the cursor back to its normal function.
5.7.2 Pencil
Draws a less dense line than the Ballpoint Pen option. The color of the pencil icon indicates the color which will be used for new illustrations.Clicking the arrow immediately below the tip of the pencil icon opens a pallet where the illustration color can be selected from 30 color options and line width/density is selected using a slider control.
5.7.3 Highlighter
Draws a bold semi-transparent line. The color of the highlighter icon indicates the color which will be used for new illustrations. Clicking the arrow immediately below the tip of the highlighter icon opens a pallet where the illustration color can be selected from 6 color options and line size is selected using a slider control.
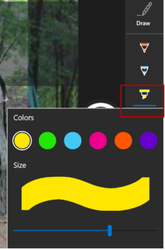
Once the color and size are selected, the cursor is used to draw on the scene.
Clicking the main Draw Control icon again, reverts the cursor back to its normal function.
5.7.4 Eraser
Removes specific illustrations (lines) or all drawings from the scene. Clicking on the eraser icon turns the cursor into an eraser which removes any drawing it passes over. Clicking the arrow immediately below the tip of the eraser icon opens a window to select the option erase all drawings on the scene (just the currently selected scene).
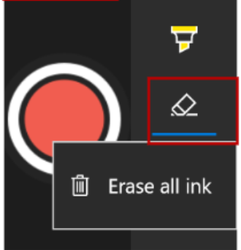
The Erase all ink option can not be undone.
Clicking the main Draw Control icon again, reverts the cursor back to its normal function.
5.7.5 Ruler / Protractor
Provides either a ruler or protractor image to be displayed to make drawing neat lines easier. The default option is the Ruler, but right clicking the option allows the Protractor to be used. In both cases, the object can be moved around on the scene using the cursor.
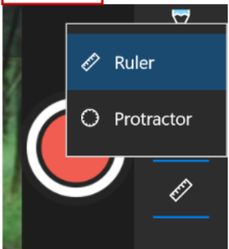
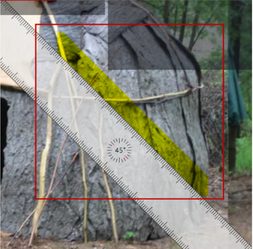
The example above shows the Ruler option used to draw a precise line using the Marker. The ruler or protractor image does not appear in the recorded scene.
Clicking the main Draw Control icon again, removes the ruler/protractor.