TouchCast Pitch MacOS : Insert Controls
Insert Objects
The Insert options are used to place media and drawing objects onto your Pitch scenes. The use of powerful elements will enhance your audience’s experience. The objects are inserted on the scene currently selected (appearing in the scene view). Inserted objects can subsequently be moved, resized and deleted using Format and cursor functions.
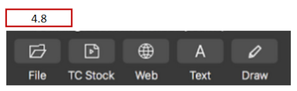
The Insert options are organized as follows:
- File – Used to insert a file (image, document, or video) on the scene
- TC Stock - Used to insert TouchCast Stock images on the scene
- Web – Used to insert a website on the scene
- Text – Used to insert text to the scene
- Draw – Used to add line, arrow, circle, and rectangle objects to the scene
Additionally, you can Cut, Copy, and Paste interactive objects from/to scenes using clipboard commands. The process begins by selecting an object already placed on a scene, then selecting the clipboard action (Cut or Copy) to be performed with the selected object. The next step is to select the scene to place the object and select the clipboard Paste option.
Inserting File Objects
File objects, including documents, videos, and images, can be inserted as objects in an existing presentation scene by selecting the file icon representing a file clicking it. Many common types of graphic media (.pdf, .png, .jpeg, .jpg, and .mp4 files) can be inserted as file objects in a Pitch presentation scene. Unsupported file types can be added to Pitch by converting them to a PDF.
A popup will prompt the author to select the file object to be inserted into the scene. In the example below, an image file (.jpg format) is selected to be inserted into the blank (black) scene.
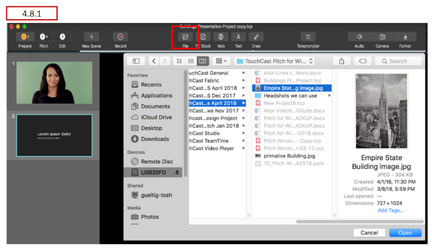
Click the Open button located at the bottom on the file selection popup.
Pitch adds the file (image) object to the selected scene as shown in the following example.
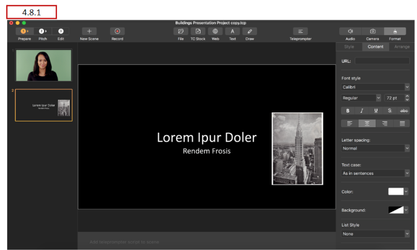
In this layout, the Empire State Building image was placed in the middle of the scene, then resized and moved to the right of the text. Note the change to the Scene List.
Inserting TC Stock Objects
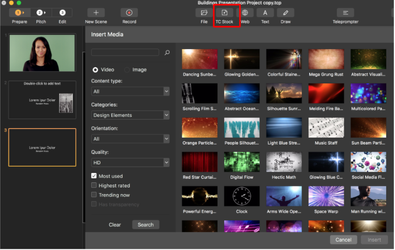
TouchCast Studio provides a collection of royalty free media (images and videos) you may insert as an object into an existing presentation scene by clicking the TC Stock icon.
When you click the TC Stock icon, the Insert Media screen opens providing you thumbnails of media plus a panel of filter criteria to narrow your search.
- Search keyword
- Videos or images
- Categories
- Orientations
- Quality
After completing your search criteria, click the Search button.
Click the thumbnail of any object and it will be inserted in your scene as shown below. In this example, a large stained glass image was selected.
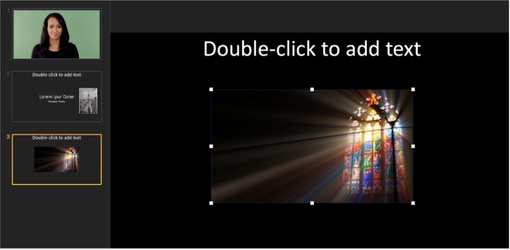
Note the change to the scene in the scene list.
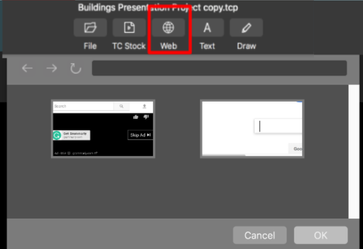
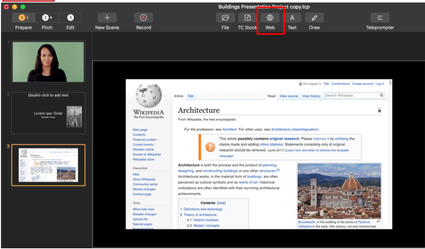
Inserting Web Objects
Web objects such as websites can be inserted as objects into an existing presentation scene by clicking the web icon.
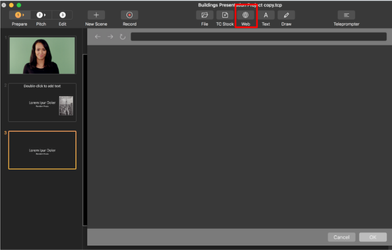
A screen for selecting web objects opens. Enter or paste the URL of the website to be added to the scene. Pitch allows the site to be searched using browser features and will show any recently visited websites.
An example of recently searched websites being displayed appears below. You can select one of the recent searches to re-use that set of results.
You may also search for key terms using the address bar. To search for a keyword or phrase, simply type the query into the address bar and hit enter. The query will result in a google search.
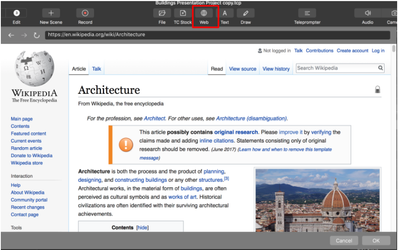
In the example below, the phrase ‘architecture’ was entered. The Google search returned relevant sites. Select the website or navigate to a specific video, then click the OK button at the lower right corner of the pop up window.
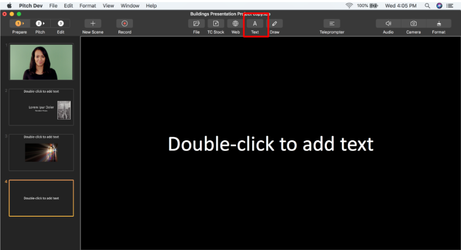
Inserting Text Objects
Text objects, such as titles and labels, can be inserted as objects into an existing Pitch presentation scene by selecting the Text icon.
The top text entry field was created by clicking a text icon on the layout. A text object box (containing the prompt phrase: Double-click to add text) is placed in the middle of the scene area. The text can be entered there and moved as necessary.
Inserting Drawing Objects
Drawing objects are used to add lines, arrows, circles, rectangles to scenes for emphasis, or to annotate a specific scene. The main drawing objects are:
- Line
- Arrow
- Circle
- Rectangle
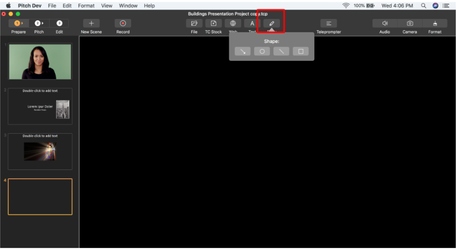
Below is additional information on the use of drawing objects.
Moving Drawing Objects
Drawing objects can be moved while the presentation is being recorded, but cannot added or removed while recording. Therefore, authors will want to place all drawing objects they plan to use while in the Prepare phase of a project.
Deleting Drawing Objects
Drawing objects can be deleted from scenes during Prepare by clicking the object and either pressing the Delete key on the device keyboard.
Drawing Line Objects
The Line drawing tool is used to add straight lines of any length or angle to the scene.
Lines are positioned by clicking the line to select it and dragging the object to the desired location by moving the cursor.
The length and direction of the line is controlled by clicking on one of the end point(s) and moving that point.
Controlling line weight and color is explained in section 4.7.3 Format Menu option.
Drawing Arrow Objects
The Arrow drawing tool is used to add arrows of any length, direction, or angle to the scene.
Arrows are positioned by clicking the arrow to select it and dragging the object to the desired location by moving the cursor.
The length and direction of the arrow is controlled by clicking on one of the end point(s) and moving that point.
Controlling arrow weight and color is explained in section 4.7.3 Format Menu option. .
Drawing Circle Objects
The Circle drawing tool is used to add circles of any size to the scene.
Circles are positioned by clicking the circle outline to select it and moving the cursor to reposition the object to the desired location using the cursor.
The size of the circle (or shape) is controlled by clicking on one of the corner point(s) and moving the cursor.
Controlling outline weight and color is explained in section 4.7.3 Format Menu option.
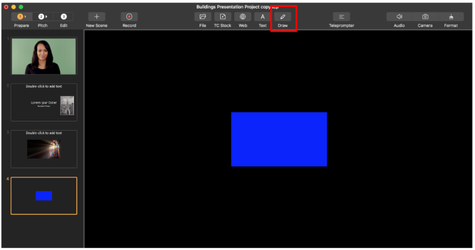
Drawing Rectangle Objects
The Rectangle drawing tool is used to add rectangles of any size to the scene.
Rectangles are positioned by clicking the rectangle’s border outline to select it and moving the cursor to reposition the object to the desired location with the cursor.
The size of the rectangle (or shape) is controlled by clicking on one of the corner points of the object box and moving that point.
Controlling outline weight and color is explained in section 4.7.3 Format Menu option.
Drawing Object Formatting
The location and size of Drawing Objects can be changed using drag and drop actions using the cursor.
The Format menu option provides controls which allow the color and width of objects and object borders to be changed.
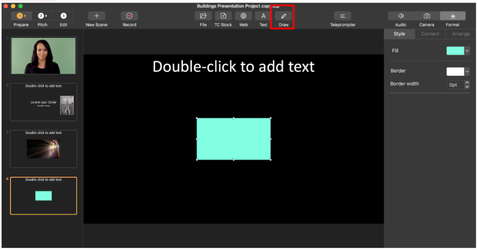
In the example below, a rectangle object was placed on the scene.
To demonstrate the use of Format options, the blue (default fill color) rectangle is modified
by selecting the formatting command: Content → Fill and selecting green as the fill color.