TouchCast Studio: How to add text as a vApp and use the Time in/Time Out feature
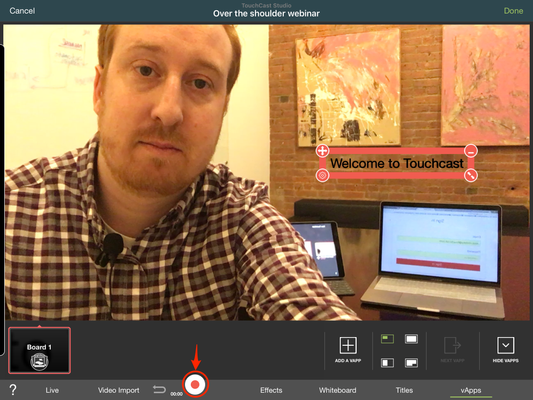
1.To begin, open up a project which you wish to add text to. Then select the scene you want to add your text and tap "add vApps".
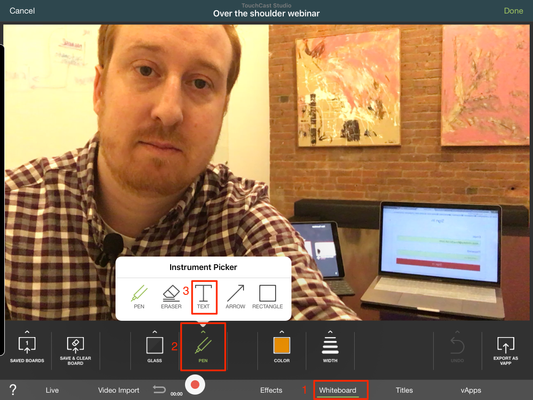
2. Under "Whiteboard" tap "Pen" and then select the "Text" option. Then tap on the screen where you want the text to appear.
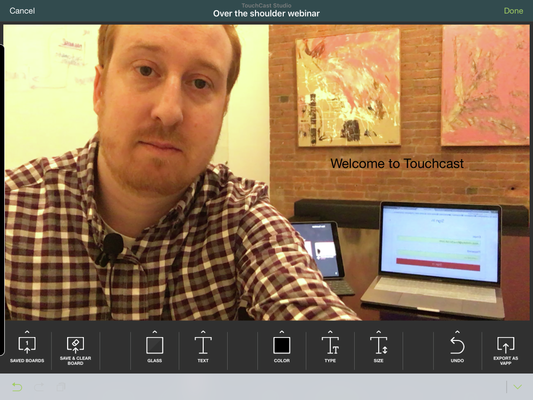
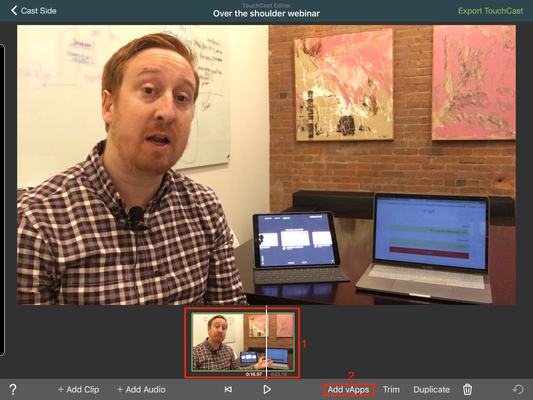
3. Tap "export as vApp" on bottom right corner of the screen. Now go to vApps and you will see all of your text as vApps on the bottom of the screen - you'll need to time them in and out now for every scene you which for a text box to appear.
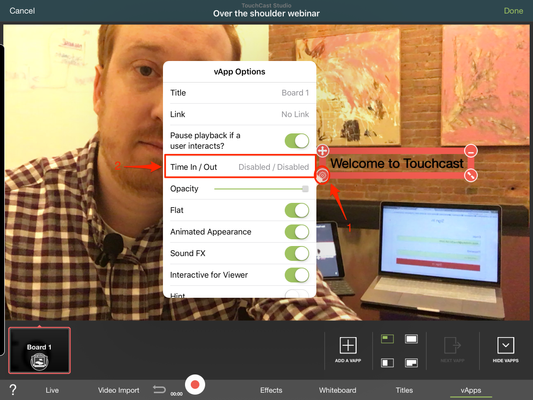
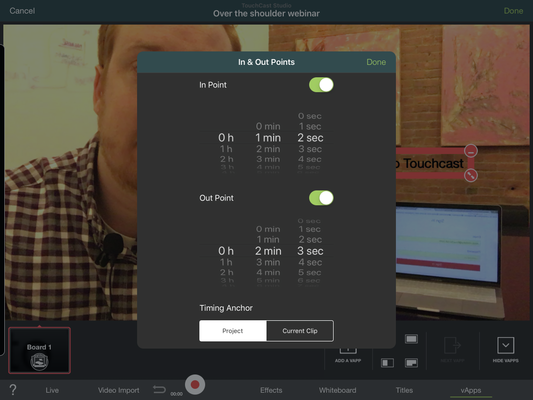
4.To time them in and out, tap on the cog on the bottom left corner of the text box while in the vApps view page, select "Time In/Out" from the drop down list and then choose when you want that specific text to appear in your scene.
5. When you're done timing your text vApps in and out, be sure to hit record and let the entire scene/video run to completion so that you can "burn" these newly added vApps into your existing video. Important to note: This step is vital and will finalize the change and show up in your final Touchcast project. Be sure to export your project once you're done to save all the changes you've made.