TouchCast Studio: Video Templates
New TouchCast Screen
It's important to understand the ‘new presentation’ options Studio provides to help you create effective videos. This section explains the options Studio provides as well as introduces a few techniques which will help you develop more complex scenes using vApps.
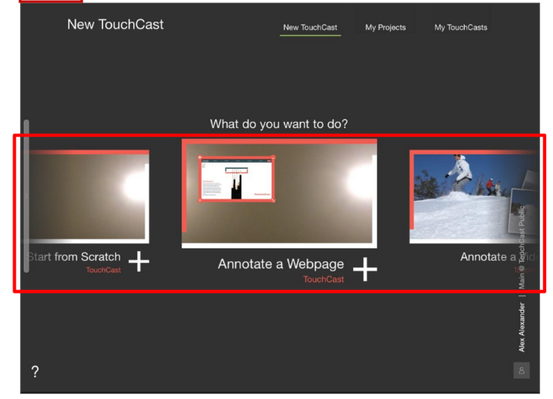
The screenshot above highlights the horizontal scrolling area where you can select from over a dozen ‘predefined’ presentation options (templates), providing you with a start on some of the most common presentation types. The options range from a presentation featuring a website, map, or document to a newsroom or ‘how to’ format. If none of the predefined options suite your interests, you can select a ‘Start from Scratch’ option and start with just the camera feed. The next section provides a quick introduction to the options you can choose from.
Start from Scratch
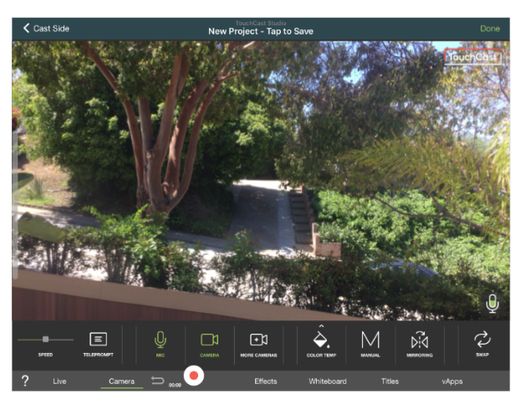
Tap the Start from Scratch option if you do not want to start with any of the other template options. The Studio Record screen will open with the current camera feed displayed in the presentation area.
From this point you can begin adding vApps, text, drawings or other objects to your presentation prior to recording it, or add them as you record. The Studio Record screen is explained in more detail in section 7 of this guide.
Annotate a Website
Tap the Annotate a Website option if you want to display a live website in your presentation. Studio will prompt you to select the website URL, then the Record screen will open with the presentation area containing the website in a window superimposed on the current camera feed. The position, size, and sharp of the website window can be modified by dragging the window or grabbing the window’s corners.
From this point you can begin adding other vApps, text, drawings or other objects to your presentation prior to recording it, or add them as you record. The Studio Record screen is explained in more detail in section 7 of this guide.