...
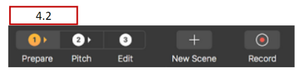
The Prepare Mode screen (shown above) contains:
- Mode selections
- Scene List and associated Scene View
- New Scene option
- Teleprompter Script options
- Settings controls
- Insert controls
Each of these is explained below.
- 4.2
...
The Mode Selections (Prepare, Pitch, Edit, Record) represent major phases of the Pitch
development process.
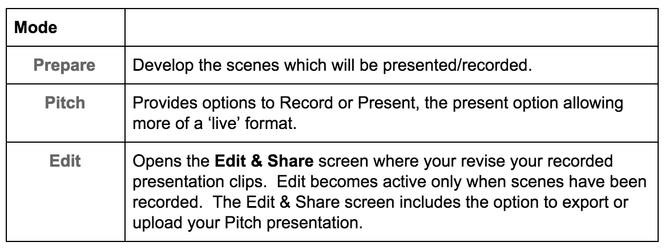
You will find that progressing through the modes may not be ‘one directional’. For example, after you record or even edit your scenes, you may realize how adding another scene would enhance your presentation. No problem. Return to Prepare mode and add that new scene, then record it. After it is recorded, you can edit it along with the other scenes in your presentation.
4.3 Scene List
The Scene List presents a thumbnail image of each scene you have added to the project along the left hand side of the Pitch screen. The currently-selected scene will display in the Scene View area of the screen. The sequence of scenes in the Scene List represents the order they will be available when the Pitch is recorded. New scenes are added to the bottom of the Scene List but can be moved or duplicated using Scene List functions.
Later, when you record or present your scenes you do not necessarily have to follow the sequence of the Scene List you developed in the Prepare activities, but you will find it easier to if you organize your scenes in the order you will record/present them.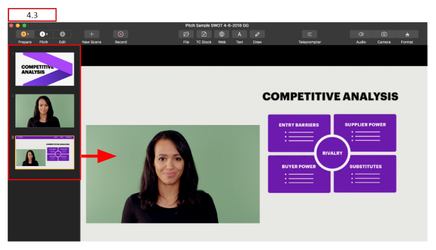
4.3.1 Scene List Expand Control
This section intentionally left blank. Not currently implemented in Pitch for Mac OS X.
4.3.2 Managing Scenes Within the Scene List
Scenes can be duplicated or deleted from the Scene List by moving the mouse pointer over the scene thumbnail and using the right-click sequence. A popup appears providing options to manage the selected scene.
...
New Scene - Insert a new scene to the bottom of the scene list. This process is explained in section 4.5 New Scene Option.
Cut/Copy/Paste - The selected scene can be moved, duplicated, or removed from the scene list using standard Cut, Copy, and Paste operations (duplicating Move, Duplicate, and Delete options).
Duplicate Scene - Clicking the Duplicate option creates an exact duplicate of the scene at the end of the Scene List
Delete Scene - Clicking the Delete option deletes the scene and the Scene List is reorganized. Note: the last remaining scene of a project cannot be deleted. The Delete option will be disabled.
Select All - Clicking the Select All option selects all of the scenes in the scene list. An example use of this function would be to select all of the scenes, then right click one of the selected scenes and select Duplicate to duplicate all of the scenes with one command. You can can also use this process to delete all the existing scenes and ‘start over’.
The order of scenes in the Scene List can be changed by ‘dragging’ them to a different place in the Scene List (click, hold, and move with cursor)
4.4 Scene View
An expanded view of the scene currently selected from the Scene List will appear in this area. This where individual scenes are developed by adding:
- File, Web, Text, and TC Stock objects
- Drawing objects
- Teleprompter script
4.5 New Scene Option
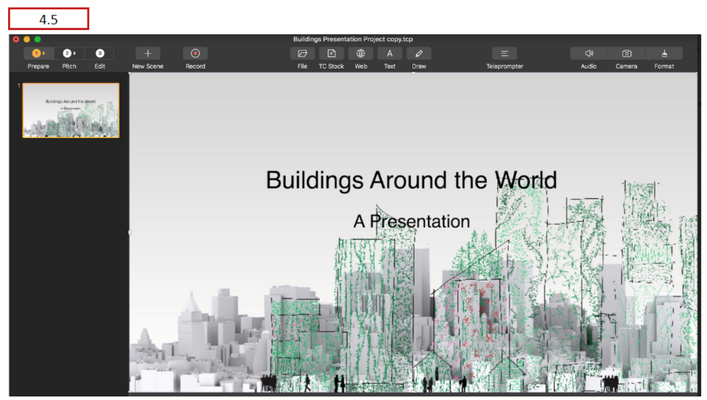
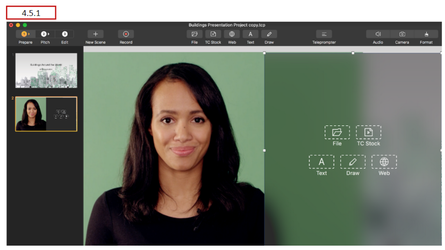
To illustrate this topic we have created a new Pitch project using the Architecture Theme. The presentation initially contains one scene, a title layout. (this demonstrates one of the features of Themes and Theme Layouts).
After the presentation title has been edited it's time to add additional scenes. In the examples below a new scenes is added.
4.5.1 Adding a New Scene Selecting Layout
The first method is to add a Scene by selecting one of the Scene Layouts associated with the Architecture Theme we selected to create the project. To do that, click the New Scene button. A selection of Scene Layouts displays.

In this example the layout splitting the scene 50/50 vertically with the camera feed on the left and interactive objects on the right is selected. 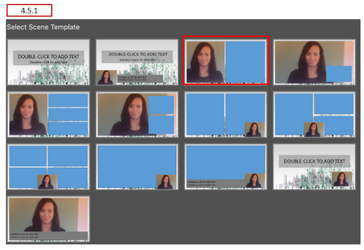
A new Scene is added to the project (see bottom of the Scene List). Normally, you would select the interactive objects to place on that right hand side of the scene but that will be shown in a later section.
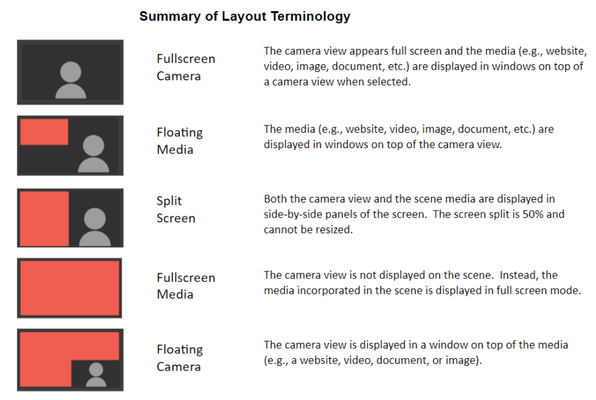
Scene Layouts help you visualize where your camera view, vApps, and banners will appear on the scene. You will get familiar with the different patterns of Scene Layouts as you work with Pitch, but here is a summary of common patterns and their terminology:
4.6 Teleprompter Script
The Pitch Teleprompter Script allows you to capture notes, script and other information associated with a scene so that it can be referred to when that scene of the presentation is being recorded. The Teleprompter Script (text) displays during recording activities and remains linked to the scene during editing.
There are two ways to create and edit teleprompter script text.
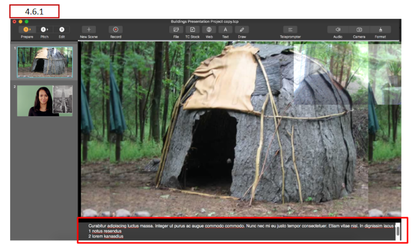
4.6.1 Enter Teleprompter Script Into Area Below Scene
One way to enter and edit Teleprompter Script is to enter / revise it using the field located beneath the scene view as shown above. Click on the teleprompter script field and begin entering text. A best practice is to break script into shorter paragraphs to make it easier to follow as you present. Also, Teleprompter Script should be written as if you were talking, not as a formal document. This way it sounds natural to your audience.
This method is useful for revising the teleprompter script for a specific scene and when you want to see the scene contents in a larger format to determine what points to include in the script.
4.6.2 Enter Teleprompter Script Into Special Window
The other method to enter and edit Teleprompter Script is to click the Teleprompter button located above the scene viewing area.
A window opens which lists all scenes defined for the presentations (in a scrollable list). The script for any scene can be entered or revised. After all script revisions for the presentation have been made, click the Save button located at the bottom of the list.
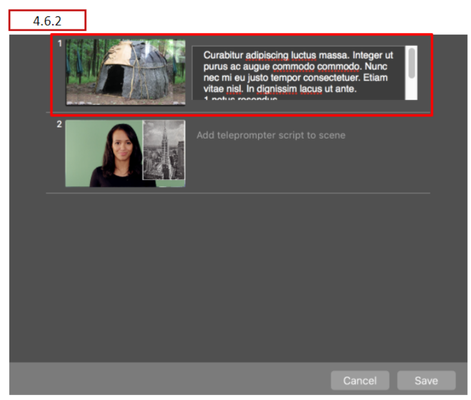
This method is useful for developing teleprompter script which needs to be coordinated between scenes. You can see points made in other scenes’ scripts and use copy and paste function to move script text.
4.6.3 Viewing Teleprompter Script During Recording
During the Pitch mode, the teleprompter will display text associated with scenes as they are recorded. The script will appear below the scene so the presenter can maintain eye contact with the audience. The teleprompter can be manually turned off using the Teleprompter toggle button. The teleprompter script appears as semi-transparent text because it is not displayed in the presentation (it is not recorded as a layer of the recorded presentation.)
If the script is longer than what can display in a few lines, the text will scroll through the display field. The speed at which the Teleprompter Script scrolls is controlled by the setting of the Scroll Speed control. A scroll setting of 100% is an average reading speed.
...